![Vivid Logo-2.png]](https://boarding.hellovivid.com/hs-fs/hubfs/Vivid%20Logo-2.png?height=50&name=Vivid%20Logo-2.png)
PRODUCT DESCRIPTION
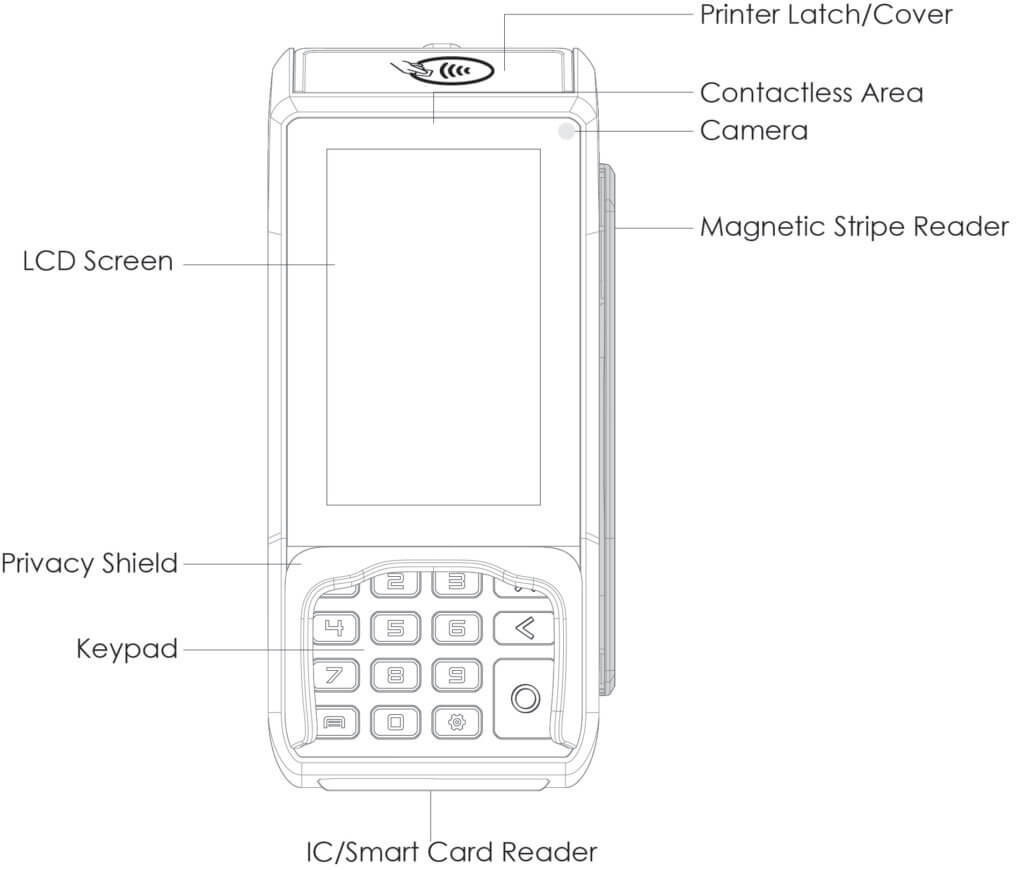
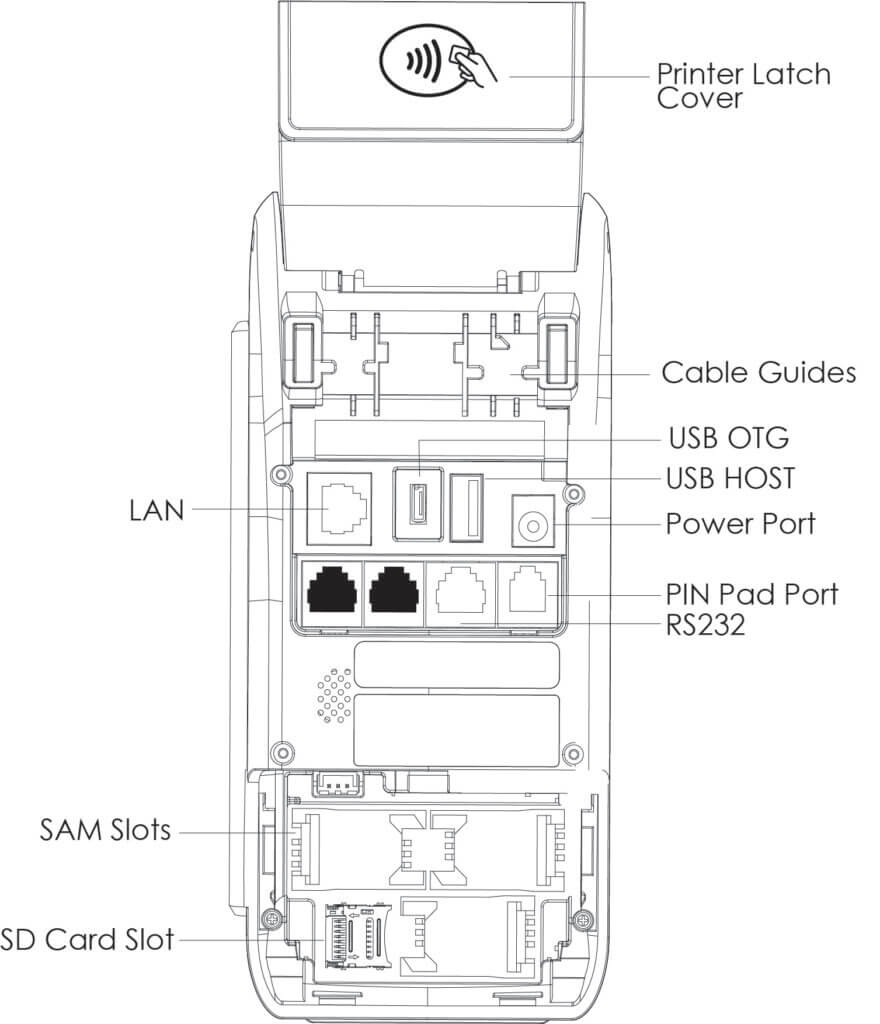
The following section points out the various hardware features and functions of the A80.
Front View:
Back View:
INSTRUCTIONS
The following sections provide basic operating instructions.
Power ON/OFF
- Power ON: Press and hold the power button down for 3 to 5 seconds and then release.
- Power OFF: Press and hold the power button down for 3 to 5 seconds and then release.
SAM/SD Card Installation
- Remove the back cover.
- Insert card into the card slot with the contacts facing upwards and the clipped corner of the card facing forward and to the right.
- Replace the back cover.
CARD READERS
The A80 includes the following card readers:
Magnetic Stripe Card
Place magnetic stripe side of magnetic card towards device interior, swipe the card with a steady speed during through magnetic reader slot.
{Supports bi-directional swiping)
IC/Smart Card Reader
Insert the card fully into the reader with the metallic contacts facing up and towards the device. Make sure that the card is fully inserted into the card reader while scanning the card.
Contactless Card Reader
The contactless card reader reads cards and devices placed roughly within an inch (2.5 mm). For best results, place as close to the reader as possible and center the card over the indicated area.
Set the Date and Time on your PAX A80
Part 1 - Verify the Date and Time of the Device
1. Exit any current applications. On the Android home screen, tap the Settings icon.
2. Enter your password, then tap OK. The default password is 9876 or pax9876@@. If neither of these passwords is accepted, contact Bluefin Support for assistance.
3. Scroll down to the System section, and tap Date & Time.
4. Review the Date, Time, and Time Zone. If any of these are incorrect, continue with Part 2.
Part 2 - Manually Set the Date and Time
1. Disable the Automatic Date & Time and Automatic Time Zone toggle buttons.
2. Make sure that the Date and Time settings are current. Tap each field to update the information.
3. Select your Time Zone, and choose whether to use a 12 or 24-hour format.
4. After you are finished making changes, back out of all options and return to the Home Screen.
Set Up an Ethernet Connection - PAX A80
Note: For the most stable connectivity, your PAX device should be directly connected to your router. Network switches can interrupt connections and cause transactions to fail or not properly post to RepairQ tickets.
1. On the Android home screen, tap the Settings Icon. Enter your password and select OK. The default password is 9876 or pax9876@@. If neither of these passwords is accepted, contact Bluefin Support for assistance.
2. Under the Wireless & Networks section, tap Ethernet.
3. Enable Ethernet by tapping the on/off switch.
4. Plug in your ethernet cable. Your router should automatically assign an IP address to your device. Go ahead and write down your assigned IP address, since you will use it in a later step.
5. Back out of all options and return to the Home Screen.
Set up a Wireless (WiFi) Connection - PAX A80/A920
We recommend that the PAX A80 device be connected directly to your router via ethernet cable, but if you are using Wi-Fi, we recommend connecting to your 2.4 GHz wireless connection to the internet, and your point-of-sale terminal must be able to connect to it over your local network.
1. On the Android home screen, tap the Settings Icon. Enter your password and select OK. The default password is 9876 or pax9876@@. If neither of these passwords is accepted, contact Bluefin Support for assistance.
2. Under the Wireless & Networks section, tap Wi-Fi.
3. Find your available network and tap on the name. Enter your password for the network and tap Connect. The device will connect to your network and assign your IP address.
4. Back out of all options and return to the Home Screen.