![Vivid Logo-2.png]](https://boarding.hellovivid.com/hs-fs/hubfs/Vivid%20Logo-2.png?height=50&name=Vivid%20Logo-2.png)
How to Enable Break-In and Break-Out
Step 1 - Head to the portal of whichever account you would like to enable the setting for. Once inside the portal head to the top left hand navigation. Then select the option for “settings”.

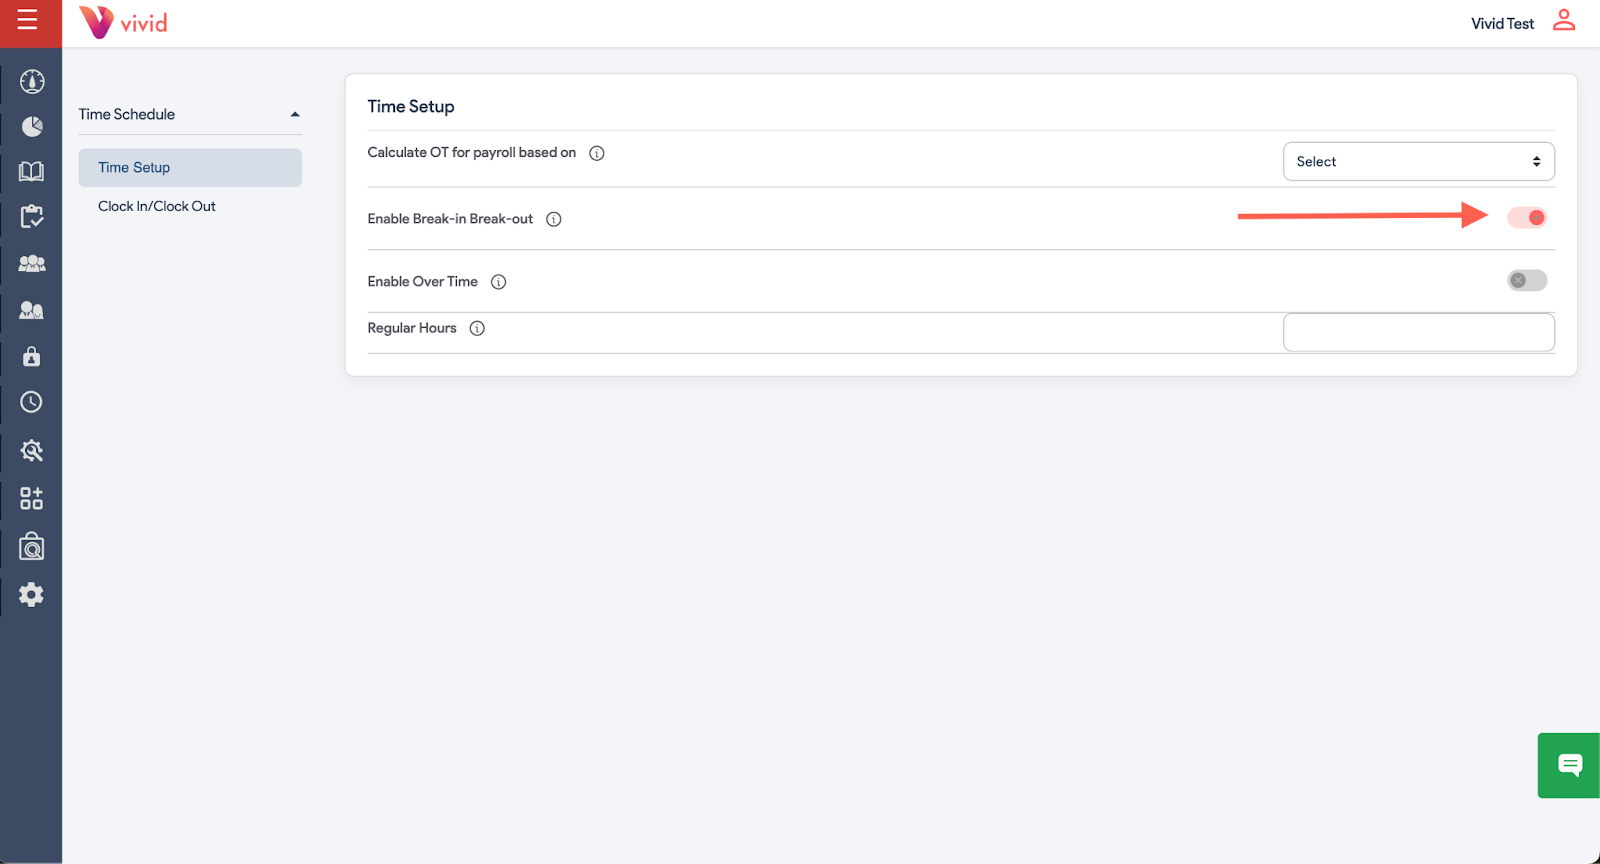
Step 2 - After selecting settings you should now see the search bar at the top of the screen. Go ahead and in that email search for “Break” this should reveal the setting “Enable Break-in Break-out” go ahead and select the setting.

Step 3 - After selecting the setting you should now see 3 settings under time setup. Please make sure that the toggle on the right hand side of the screen for “enable break-in break-out” is green and enabled.
Step 4 - After this has been enabled go ahead and restart the POS application. To see the functionality of this setting clock in with your employee pin. This can be done by selecting the “Clock in/Clock out” button on the bottom right of the employee pin screen.
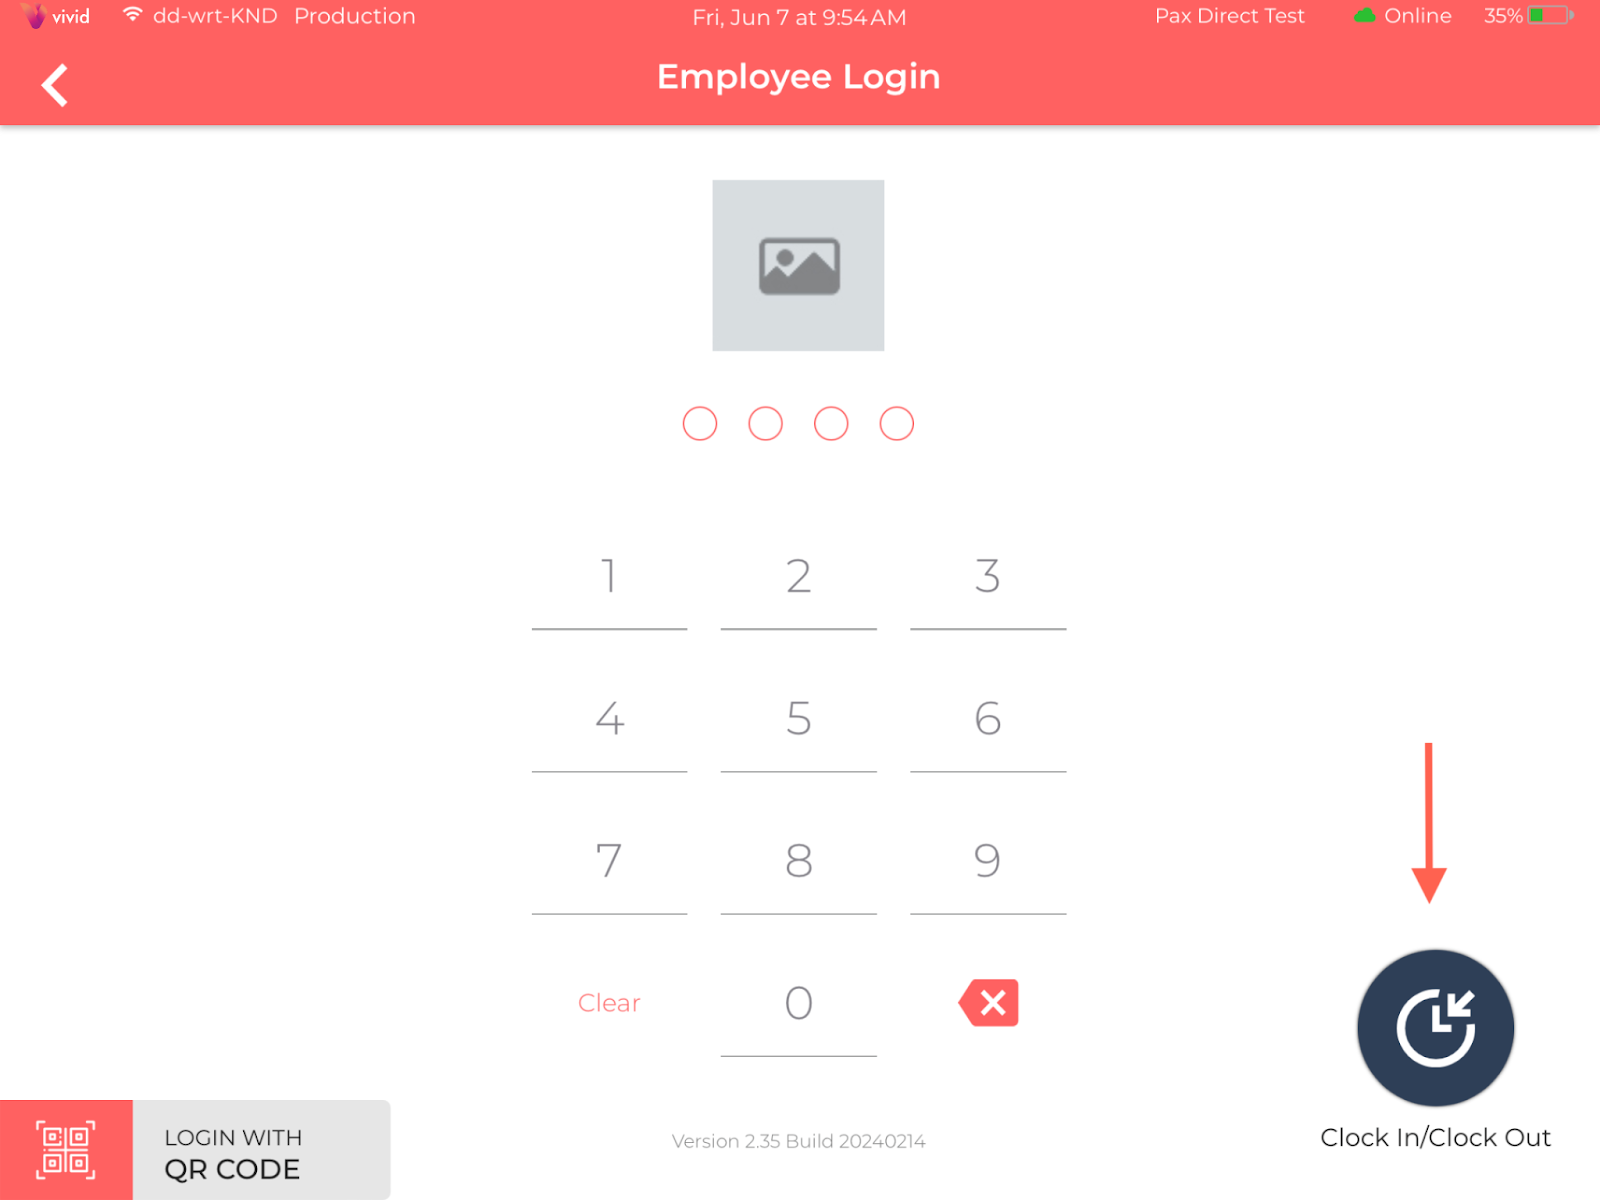
Step 5 - After selecting the clock in/clock out button, you will be met with the clock in popup in which you will put in your employee pin. After putting in your pin, you will be clocked in and logged into the POS.
Step 6 - When your employee wants to take a break, they must come back to the employee login screen shown above and select the clock in/clock out button again. Except this time since they are already clocked in they will be met with two options. Break in and Clock out, to take a break simply select break in.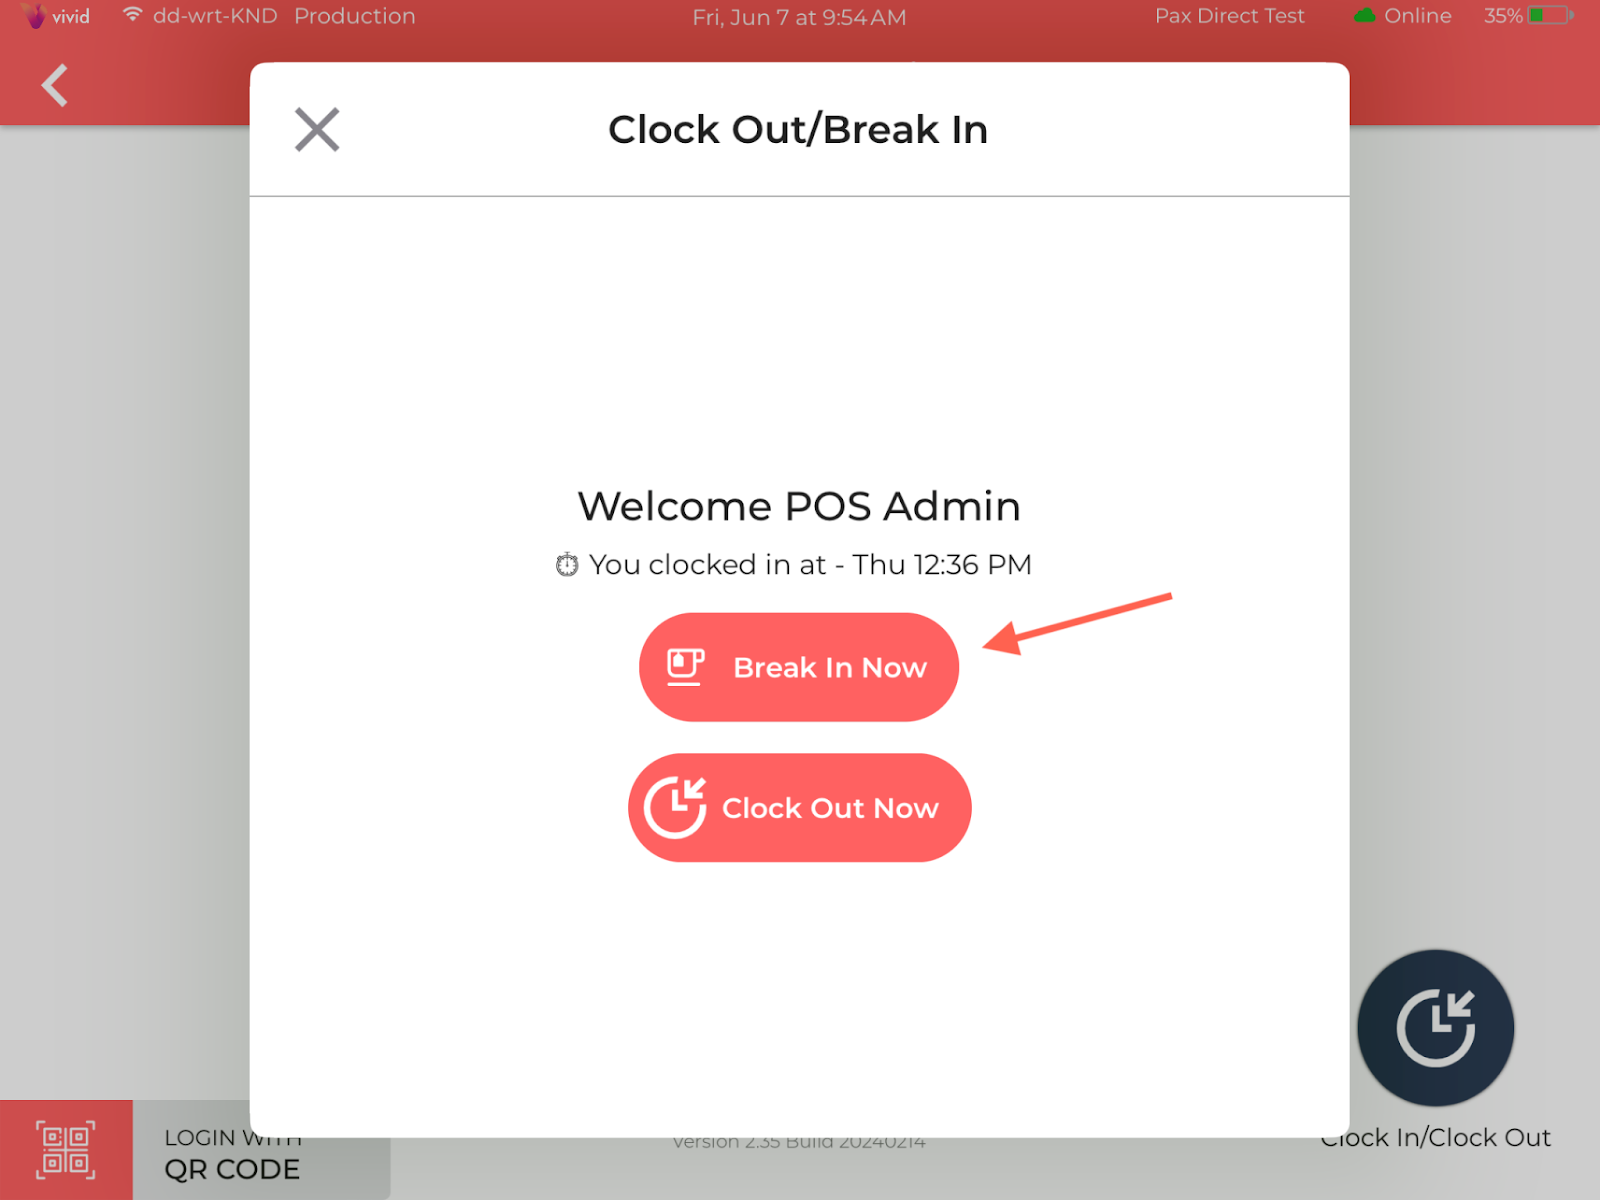
Step 7 - After the employee is done with their break they can head back to the employee login screen, punch in their employee number and it will ask them to break out. Once they break out, they will be taken back into the POS and can go about their day.

Notes -
The break in and break out times are tracked on the time management section in case they need to be adjusted as well as the time report as shown below.